The Admin functionality in Data Talks CDP allows you to manage your organization account and users. Only admins will have access to this functionality.
How it works #
This guide will describe step-by-step how you can manage your organization in the Admin pages.
Navigating the Admin panel menu #
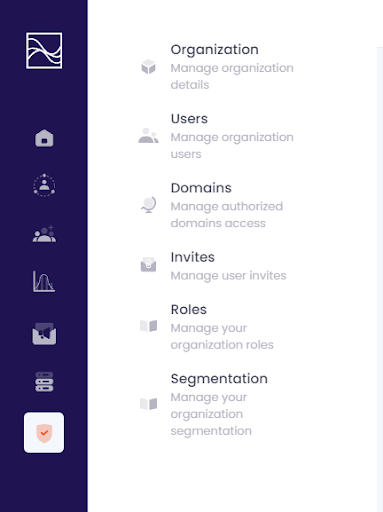
- By clicking the Admin icon on the left hand side navigation bar you will see the Admin panel menu fold out. Here you can see the different Data Points categories:
- Organization: Here you can manage your organization, change the name and add a logo and header.
- Users: Here you can manage your users and their rights.
- Domains: Here you can change your organization’s domain.
- Invites: Here you can send invitations to anyone that you want to join your organization.
- Roles: Here you can create new roles for the users that join your organization.
- Segmentation: Here your admin users can enable and disable attributes that your organization can create segments on.
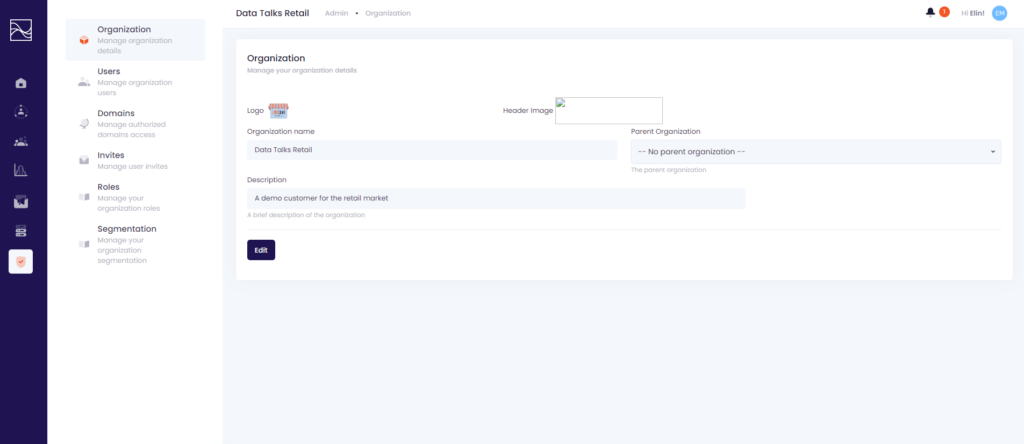
- When you open the Organization page, you will be able to manage your organization details. Here you can:
- Change the logo of your organization.
- Change the header image of your organization.
- Change the name of your organization.
- Add a parent organization.
- Change the description of your organization.
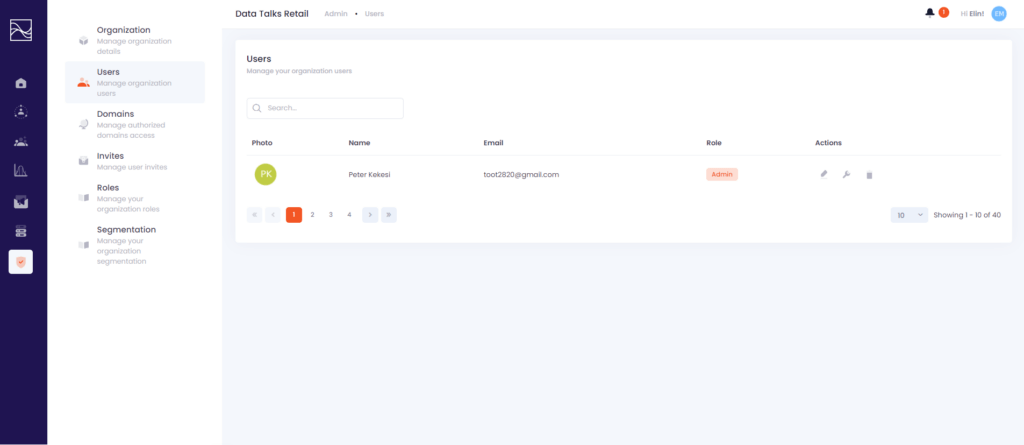
- When you open the Users page, you will be able to manage your organization’s users. Here you can:
- Get an overview of your organization’s users.
- By clicking ‘Edit details’ under Actions you can edit the user’s role.
- By clicking ‘Delete’ under Action you can delete the user.
- When you open the Domains page, you will be able to select which domain your organization should have. Here you can:
- Add new domains.
- Enable and disable existing domains.

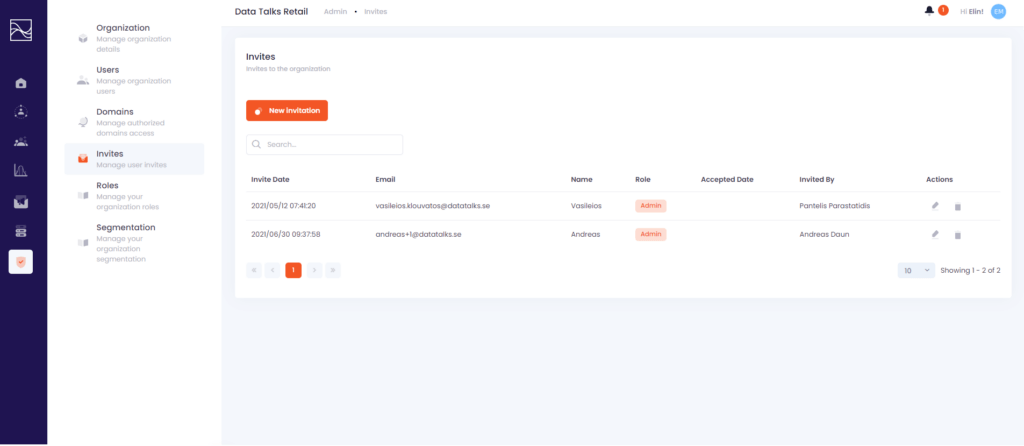
- When you open the Invites page, you will be able to send invitations to anyone you want to join your organization. Here you can:
- View pending invitations.
- Send new invitations to anyone that you want to join your organization.
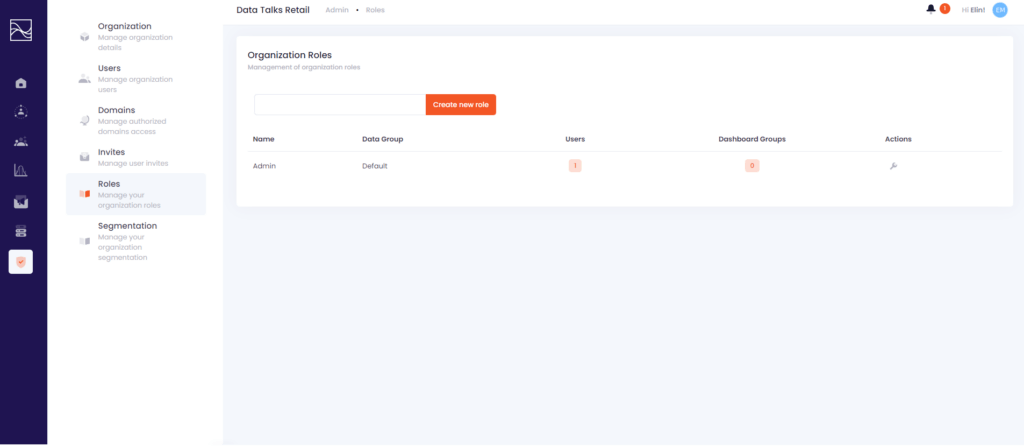
- When you open the Roles page, you will be able to create new roles that you can assign to the users within your organization. Here you can:
- View all the existing roles in your organization.
- Create new roles by adding a name and clicking ‘Create new role’.
- Manage your roles by clicking the tool icon under ‘Actions’.
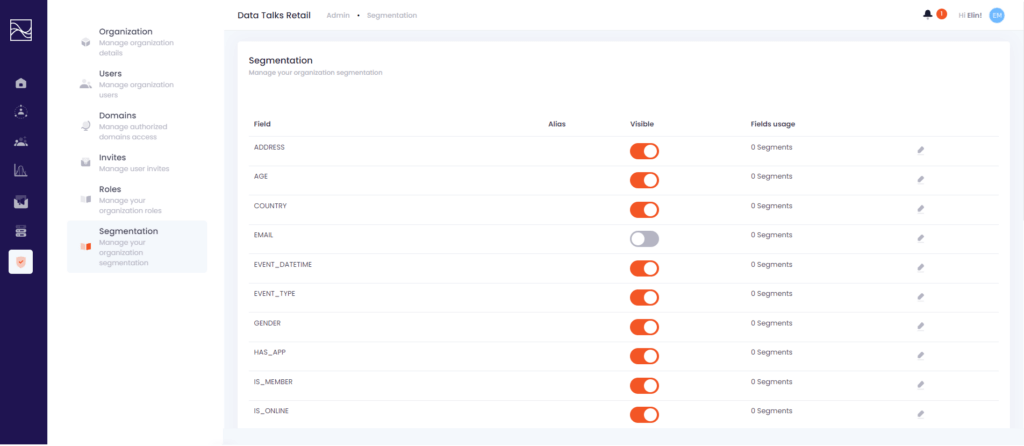
- When you open the Segmentation page, you will be able to decide which attributes users within your organization should be able to segment on. Here you can:
- Enable attributes by clicking the toggle bar to the right. If it’s orange it means that the attribute is enabled.
- Disable attributes by clicking the toggle bar to the left. If it’s grey it means that the attribute is disabled.
- Add an Alias to the attribute by clicking the ‘Edit details’ icon to the far right. The Alias will replace the field name in the Segment Builder.