By separating your customers into audiences of Profiles with similar characteristics, preferences and behaviors you can easily personalize their customer experience. Your segments can be used when launching campaigns or when you are creating your analysis reports. You are also able to share it with your other systems.
The Segment Builder also gives you full flexibility by allowing you to configure the attributes you’d like to group your customers by. You can decide by yourself which attributes you would like to include as Rules in the Segment Builder, and use them to create segments.
How it works #
This guide will guide you step by step through the feature Segment Builder and how you can use it to start leveraging your customer data and create better customer experiences.
Navigating the Segments List #
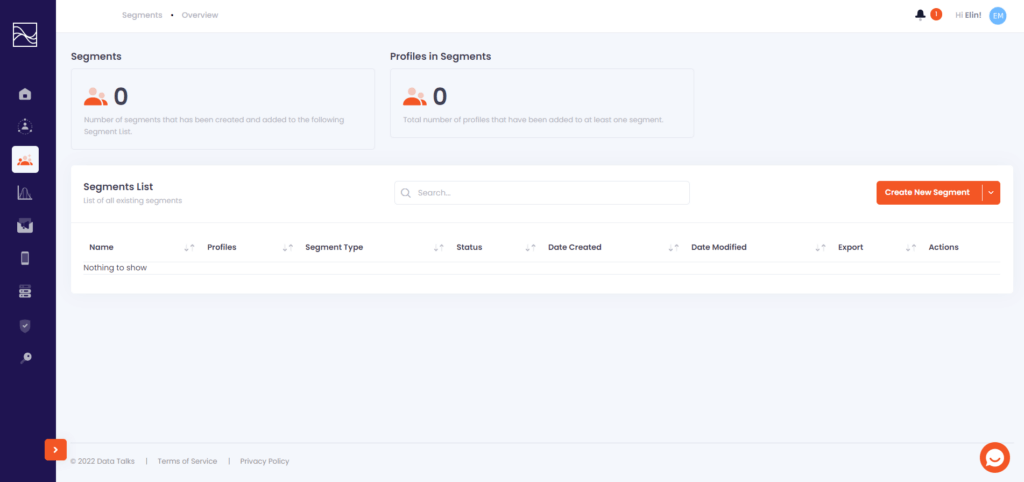
- Click the Segments icon on the left-hand side menu and you will be directed to the the Segments Homepage, where you are able to view the following:
- The total number of Segments you have created in the Segments List.
- The total number of Profiles (see Data Points for more information on Profiles) in all of your Segments.
- The Segments List displays all of the Segments you have created.
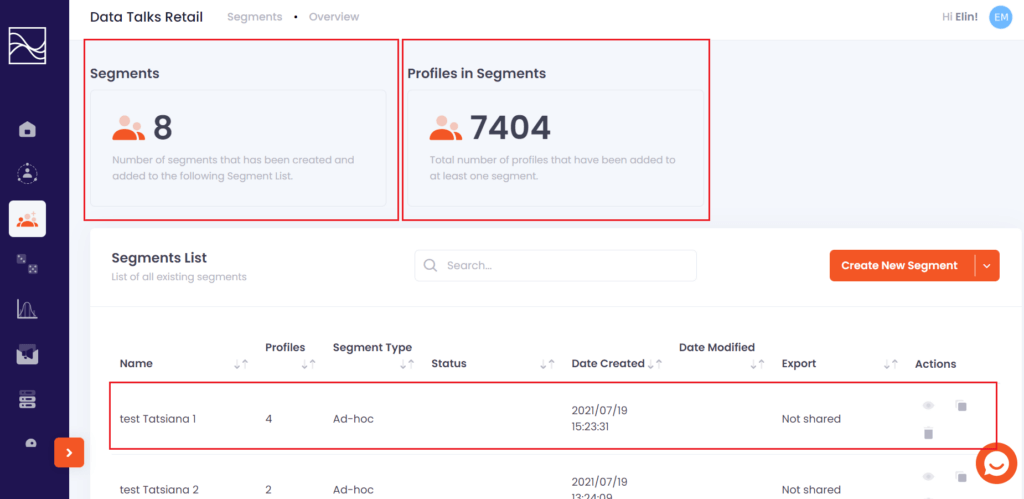
- In the section Segments List you can click any of the Segments listed. When you click it you will be redirected to an overview of the specific segment you clicked on.

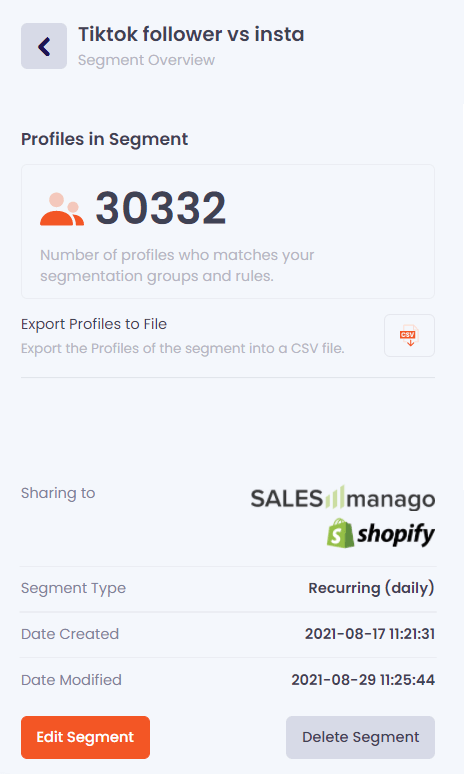
- Here, you can find the segment details in the left column:
- How many Profiles are in the segment.
- By clicking the CSV icon you can export the Profiles of the segment into a CSV file.
- If the segment is shared to another system under ‘Sharing to’.
- What type of segment it is under ‘Segment type’.
- When it was created.
- When it was last modified.
- By clicking Edit Segment you will be redirected to the Segment Builder where you can edit the segment. If you want to delete the segment simply click Delete Segment.
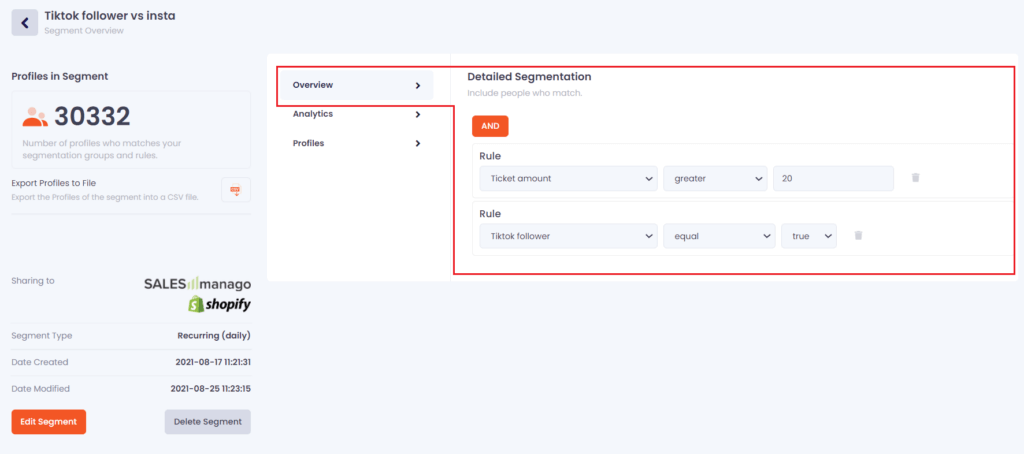
- To the right in the Segment overview you will find the Rules that are set for the specific segment. You also have the option to delete them.
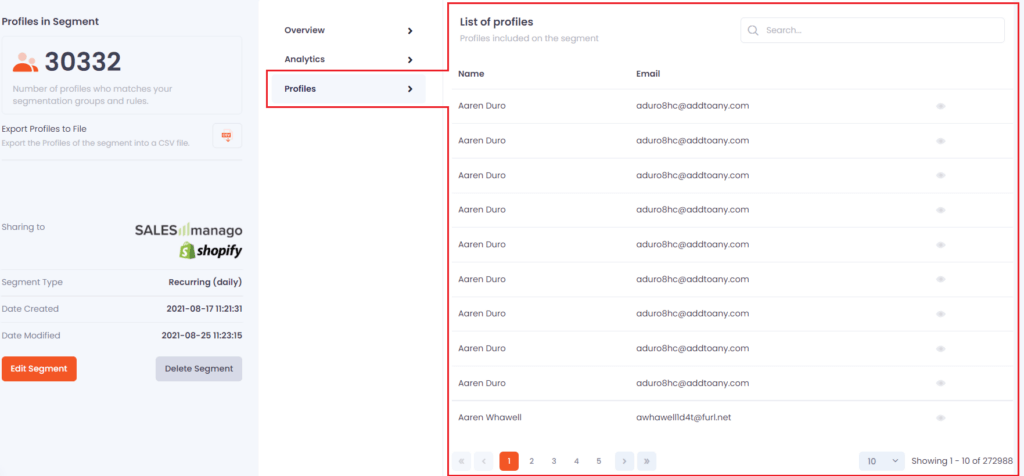
- In the ‘Profiles’ tab you will find a list of the Profiles in the specific segment you’re looking at.
- You can now go back to the Segments Homepage to start creating your segments!
How to create a New Segment #
- Click Create New Segment and choose option “Segment Builder”.
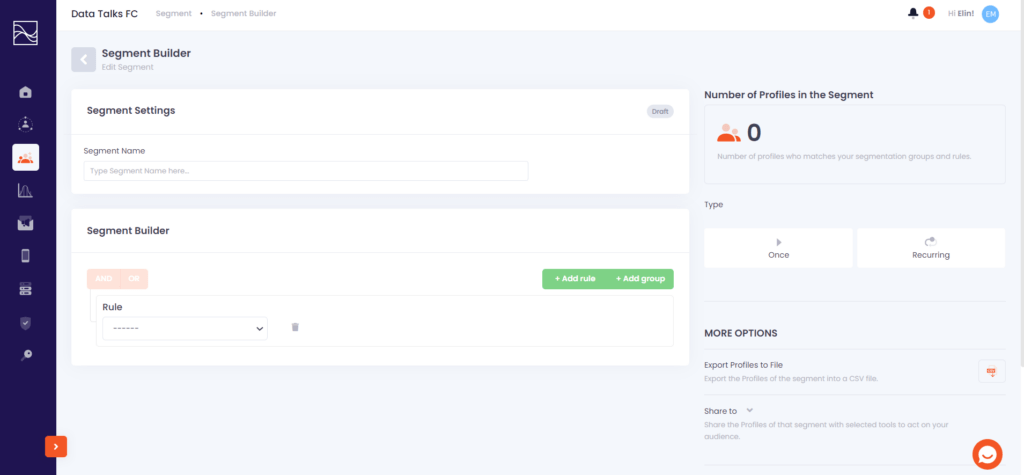
- In the Segment Builder section, you are first able to name your Segment. You can also do this after choosing your Rules if you are not sure yet what you want to name your segment.
- NOTE: If you want to share your segment with SalesManago, you cannot include special characters, including characters such as åäö etc.
- By default there is a Rule box displayed with no value in it. Applying a Rule to your Segment is like applying a condition. From a drop-down list you are able to pick the Rule you wish to apply. After picking your first attribute (Age, Gender, etc) you then need to choose in what way the Rule should condition your Segment and choose the condition (less than, equals to, etc). Depending on the attribute, you also need to pick whether the Rule needs to be True, False or put in another value. Lastly, you need to press the green +Add rule button in order to activate the Rule. See example below.
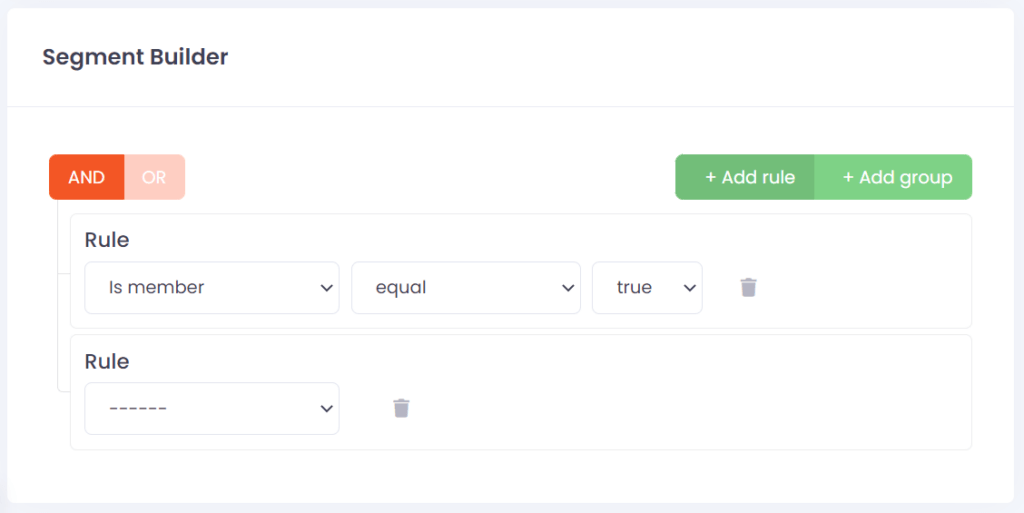
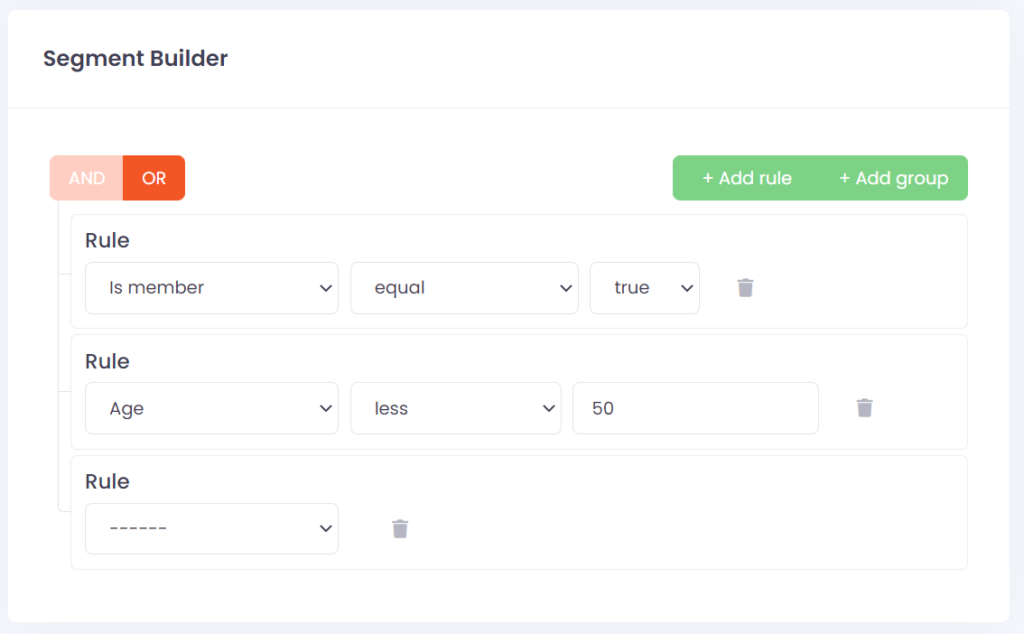
- When applying more than one Rule you are able to choose how they work together by choosing either AND or OR in the orange button. When AND is applied it means that a Profile in your Segment needs to satisfy all of your Rules in order to qualify for that Segment. See example below.
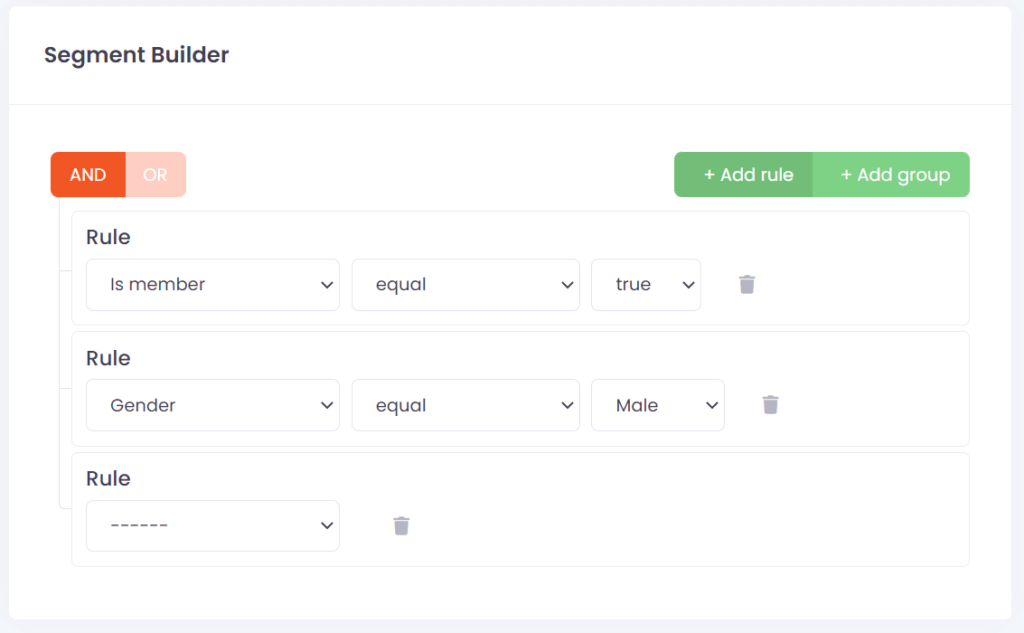
- If you choose OR , the Profiles in the Segment will only need to satisfy one Rule. See example below.
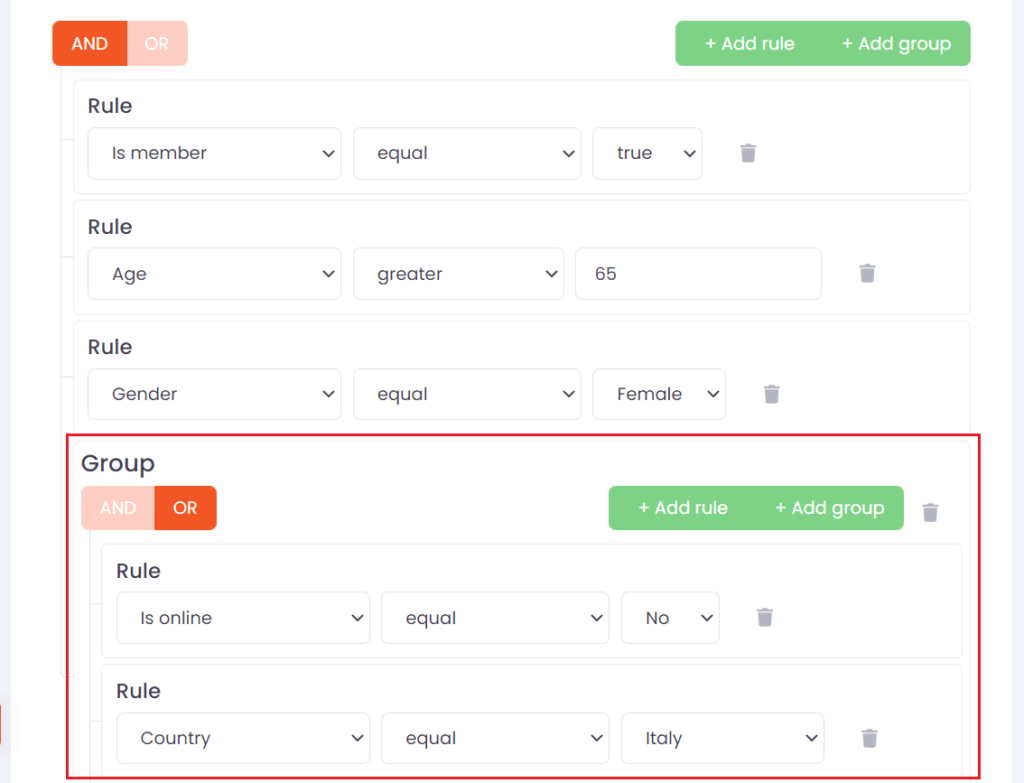
- When you want to create more complex Segments you can click the green +Add group button which allows you to group several Rules into one layer. You are then able to both have several Rules that a Profile needs to satisfy and another layer where the Profile only needs to satisfy one or the other. This allows you to create sophisticated Segments. See example below.
- When you have applied all the Rules you wish to have for your Segment you might be ready to give the segment a name.
- To the right you can see Profiles in Segments which simply shows you the number of Profiles in the Segment you just have specified the Rules for. After applying your Rules you need to click the Preview button at the bottom in order for the number of Profiles to be correctly displayed.
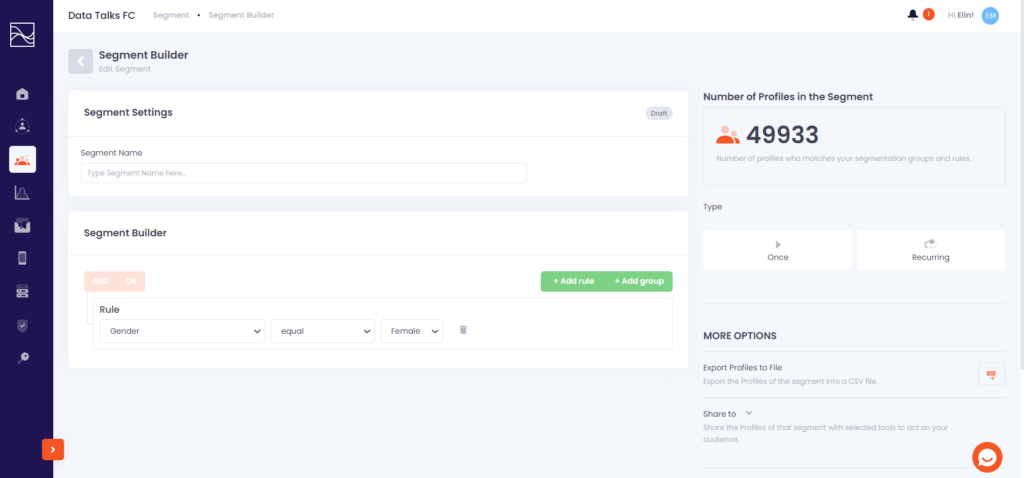
- The next step is to select Segment Type, where you define what type your Segment is. You have two options:
- Once: Click Once to create an ad-hoc Segment with a one-off calculation.
- Recurring: If you want to create a Segment which is recalculated regularly, click Recurring. This means the system will automatically update the recurring segment with new profiles corresponding to the segment rules.
- Frequency: You can choose how frequently this recurring segment is recalculated and updated among Daily, Weekly, Monthly or Yearly.
- Start date and time: You can choose a start date and time in the future. The system will calculate the recurring segment at the start date and time you set for the first time and then recalculate it at the same time every day/week/month, or year, depending on the frequency.
- End date and time: You can choose the end date and time in the future from now and from the start date and time. The recurring segment won’t be recalculated after the end date and time and will be marked as completed.

NOTE: You can edit the recurring segment only if it is not completed and is still active. You are able to change the segment details, segment rules, and calculation frequency. You are also able to change the Next Run time if you want to change it after the segment has already been calculated more than once.
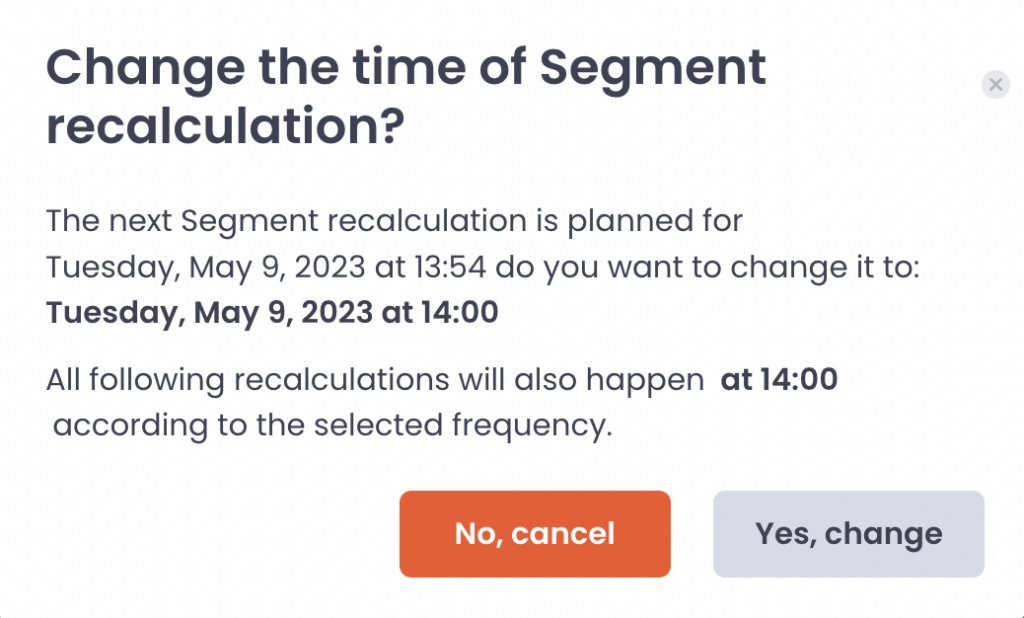
In order to do that, please tick the checkbox under Next Run: I want to change the time of execution for the Segment’s next execution and set the expected time.
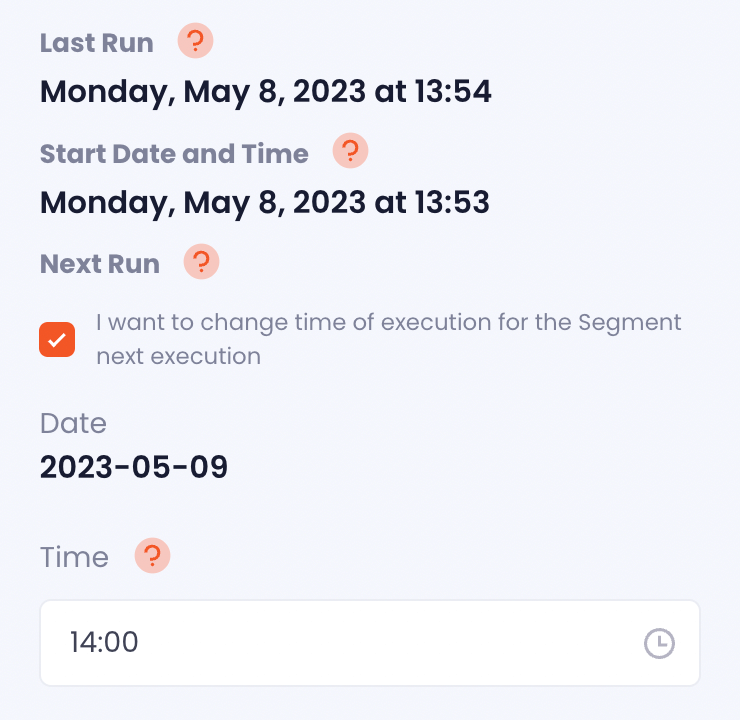
Then you will see this pop-up message showing the changed next run date and time. Please click Yes, change in the pop-up and Save Changes in the editing screen of the segment to confirm the change. The edited recurring segment will recalculate at the revised time according to the frequency.
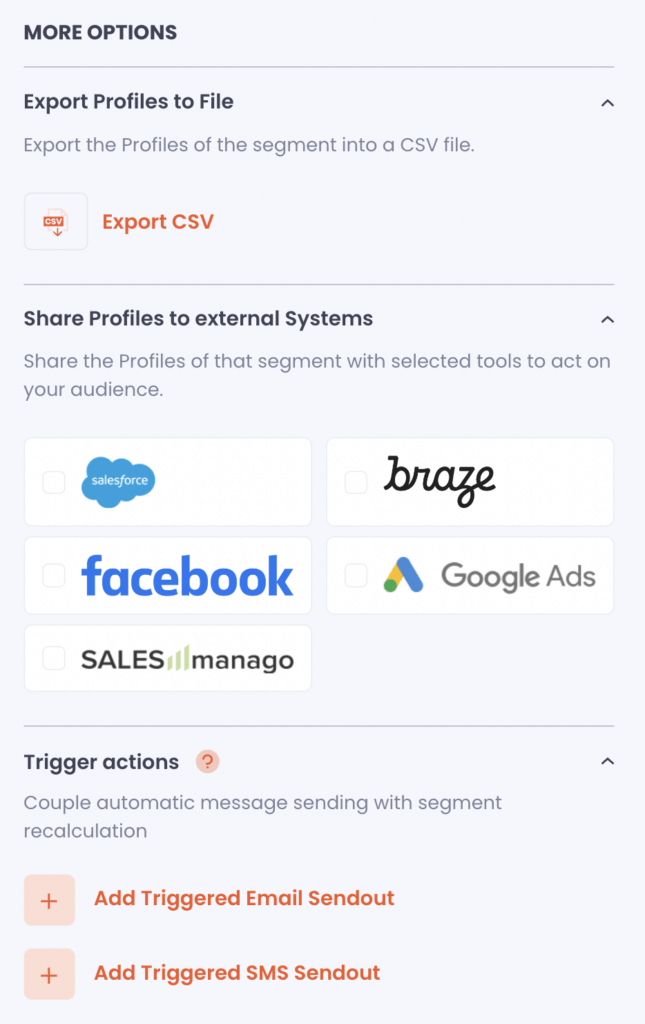
- Under the More Options, you have a few different options:
- Export Profiles to file: By clicking the CSV icon to the right you can export the Profiles in the Segment to a CSV file.
- Share Profiles to external Systems: Tick the box to the system that you want to share the Segment with.
- Tips: Aren’t you able to see Facebook and Google Ads in this section of the CDP? Please refer to these guides to configure integrations.
- NOTE: Editing ad-hoc/recurring segments shared with other systems in the CDP will affect the shared segments in the systems from the CDP.
- Trigger actions: If you define your segment, you can configure Triggered Campaigns with it, the sendouts which will be sent based on selected frequency in the recurring segment setting or when you schedule your ad-hoc segment. Click “Add Triggered Email Sendout” or “Add Triggered SMS Sendout” to proceed.
- NOTE: Editing ad-hoc/recurring segments connected to triggered actions in the CDP will affect the triggered campaigns.
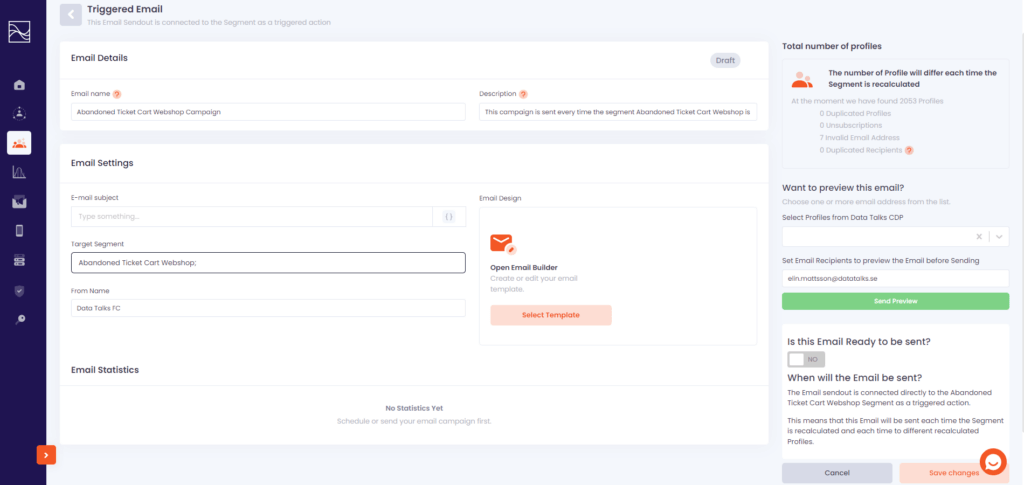
- Triggered Actions: If you click to Add Triggered Sendout, are then redirected to the Email/SMS Builder where you can connect it to a specific email or SMS campaign.
- 12.1: Triggered Email campaign: As you can see, this email campaign is directly connected to the recurring segment. You can either save it as a draft or turn it on by the toggle button under the question “Is this Email ready to be sent?”. If you want to know more about how to design your email campaign, look at our Email Builder guide.
- 12.2 Triggered SMS campaign: The SMS campaign is directly connected to the recurring segment. You can either save it as draft or turn it on by the toggle button under the question “Is this Email ready to be sent?” If you want to know more about how to complete your SMS campaign, look at our SMS Sendout guide.
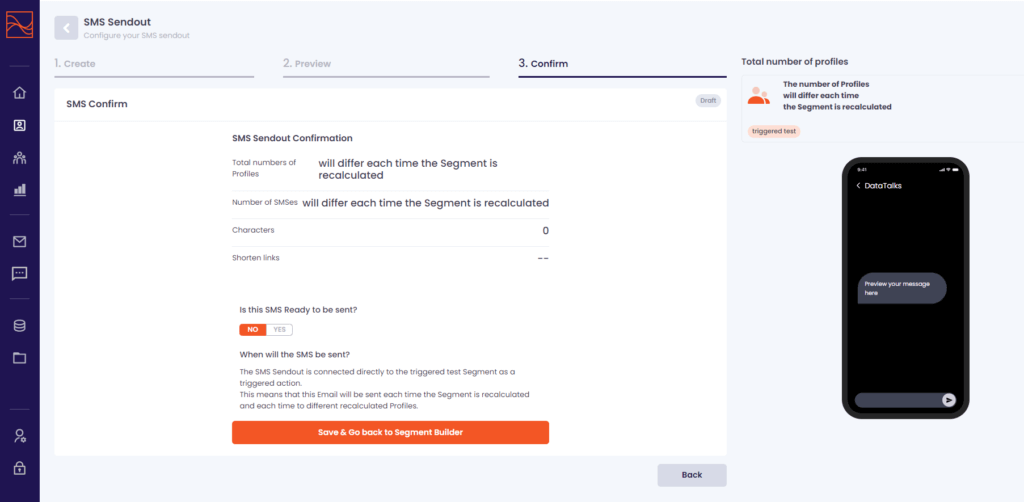
NOTE: Keep in mind that mass SMS is charged separately based on the volume of SMS sent per month. You can get the current SMS price list for your region(s) from your Customer Success Manager.
- Lastly, you can choose to Preview before you click Save Changes. You have just created your first Segment!
- If you want to add more attributes to the segment, given that you are sending that data to us, you can do it by following these steps:
- Go to the Admin pages > Segmentation.
- Click Refresh Information to get the most recent available data.
- Toggle on the additional attributes you want to appear in the Segment Builder.